Delicate, buttery, and aptly named, these bites of bliss dissolve in your mouth leaving only sweetness behind.
What Makes Melting Moments So Special?
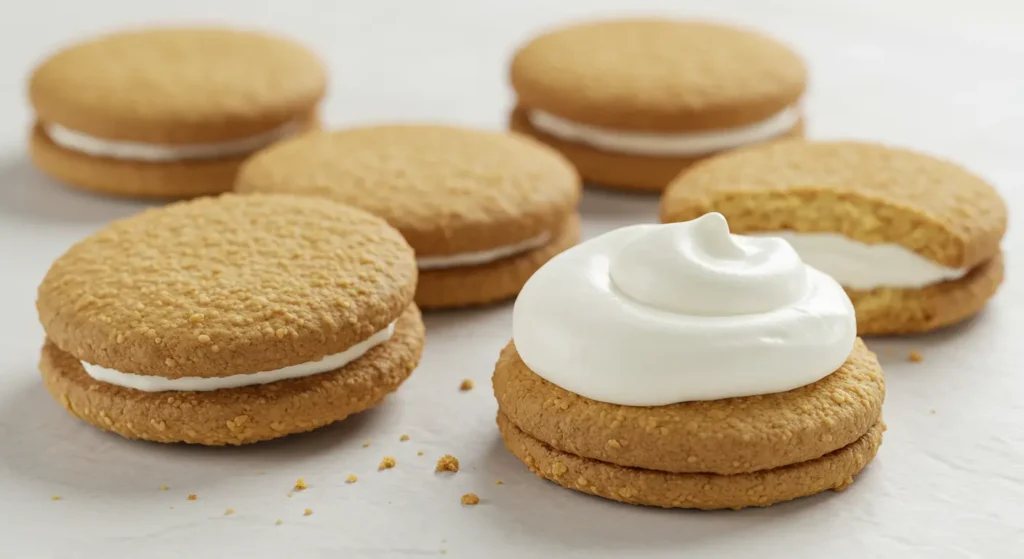
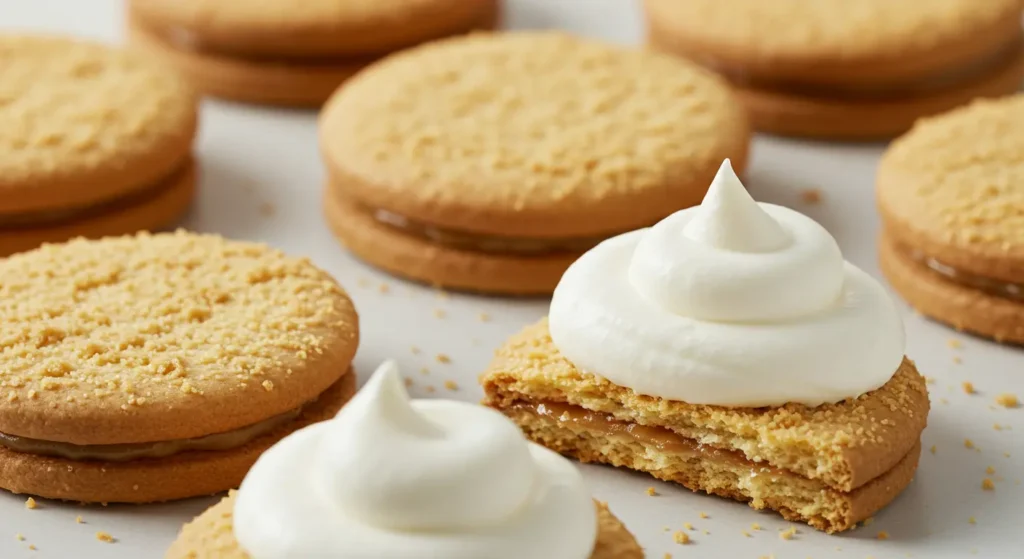
Melting moments are the epitome of simple yet extraordinary baking. These shortbread-like cookies have earned their name from their distinctive melt-in-your-mouth texture that comes from the perfect blend of butter and flour. Unlike many other cookies that rely on eggs for structure, these delicate treats skip this ingredient entirely, allowing the pure buttery flavor to shine through.
What sets melting moments apart is their incredible lightness. Each bite offers a gentle resistance before dissolving into a sweet, buttery sensation that seems to vanish on your tongue. This magical texture is why they’ve become favorites at afternoon teas, holiday gatherings, and as homemade gifts across many countries.
The beauty of these cookies lies in their simplicity. With just a handful of basic ingredients, you can create something truly special. While the classic recipe calls for butter, sugar, flour, and cornstarch, there’s still plenty of room for creativity through different fillings, flavorings, and decorative touches.
The secret to perfect melting moments isn’t complicated techniques or rare ingredients—it’s understanding how these simple components work together to create something greater than the sum of their parts.
The History Behind These Beloved Cookies
Melting moments have a rich history that spans continents and cultures. Their origins can be traced back to traditional Scottish shortbread, which dates to at least the 12th century. However, the modern melting moment as we know it today took shape in the early 20th century when cornstarch was added to the basic shortbread recipe.
This addition of cornstarch was revolutionary for the texture of these cookies. By replacing some of the wheat flour with cornstarch, bakers created a more tender crumb that truly “melted” in the mouth. This innovation spread quickly throughout the British Commonwealth countries, with Australia and New Zealand particularly embracing these cookies as their own.
In Australia, melting moments evolved further with the addition of a creamy filling, often flavored with passionfruit, creating sandwich cookies that became staples at bakeries nationwide. Meanwhile, in parts of North America, similar cookies became known as “meltaways” or “whipped shortbread.”
The popularity of these cookies surged during the mid-20th century when home baking experienced a renaissance. Their straightforward recipe made them perfect for home bakers, while their elegant appearance made them seem much more complex than they actually were.
Today, melting moments continue to be cherished around the world, with each region adding its own twist to the basic recipe. They represent the perfect blend of tradition and simplicity, proving that sometimes the most basic recipes create the most memorable treats.
Classic Melting Moments Recipe
Making melting moments at home is surprisingly easy. Here’s a foolproof recipe that captures the essence of these buttery delights:
Ingredients You’ll Need
- 250g (1 cup) softened butter
- 1/2 cup powdered sugar
- 1 1/2 cups all-purpose flour
- 1/2 cup cornstarch
- 1 teaspoon vanilla extract
- Zest of one lemon (optional)
Step-by-Step Baking Process
- Preheat your oven to 160°C (320°F) and line two baking sheets with parchment paper.
- Beat the butter and powdered sugar until pale and fluffy, about 3-4 minutes.
- Add vanilla extract and lemon zest (if using) and mix well.
- Sift together the flour and cornstarch, then gradually add to the butter mixture.
- Mix until just combined—do not overmix or you’ll lose that tender texture.
- Transfer the dough to a piping bag fitted with a star tip. Pipe 1-inch rounds onto the prepared baking sheets, leaving about 1 inch between each cookie.
- Alternatively, roll small balls of dough and flatten slightly with a fork.
- Bake for 12-15 minutes until the edges are just barely golden.
- Allow the cookies to cool completely on the baking sheet before handling—they’re very delicate when warm.
Tips for Perfect Texture Every Time
The key to achieving that signature melt-in-your-mouth quality lies in these crucial details:
- Make sure your butter is properly softened but not melted. Cold butter won’t cream properly, while melted butter will result in spread-out cookies.
- Sift your dry ingredients to remove any lumps and ensure even distribution of the cornstarch.
- Handle the dough as little as possible once the flour is added. Overworking develops gluten, which toughens the cookies.
- Let your baking sheets cool completely between batches. Placing dough on warm sheets causes the butter to melt too quickly.
- Store in an airtight container between layers of parchment paper to maintain freshness and prevent breakage.
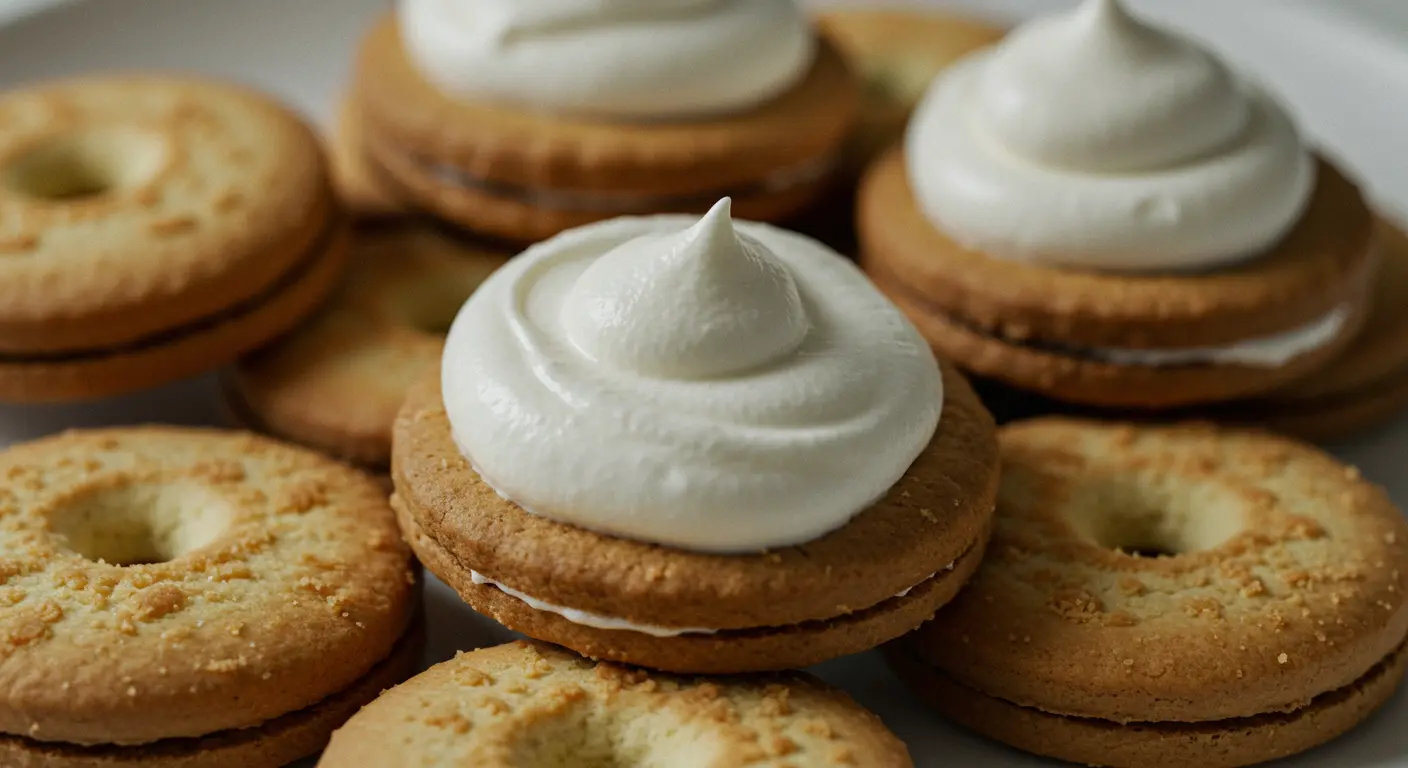
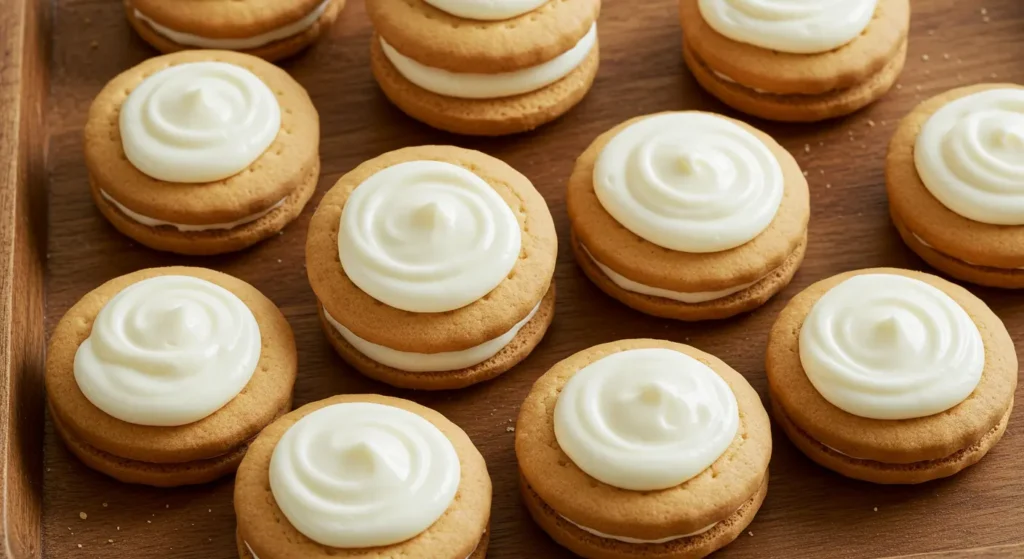
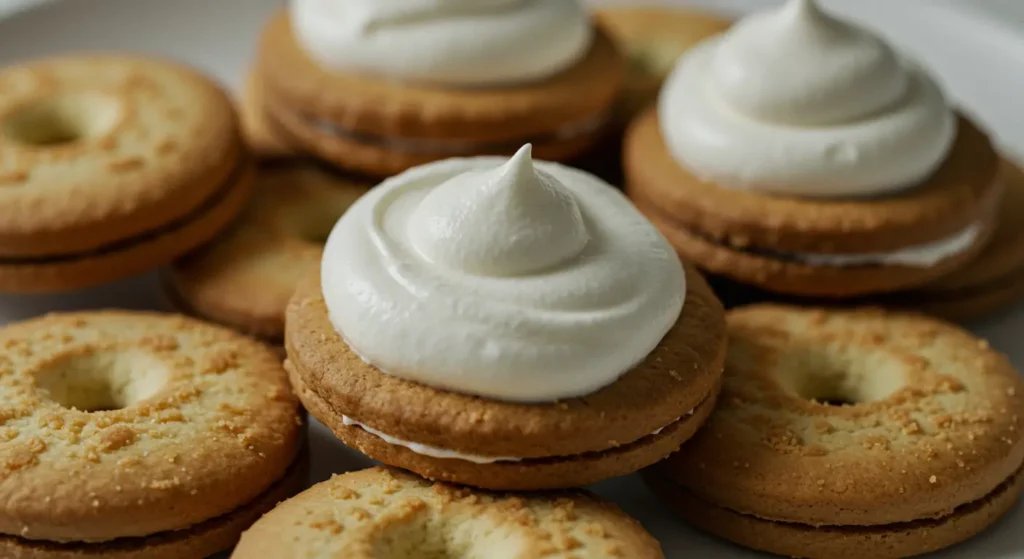
Delicious Filling Ideas for Sandwich-Style Melting Moments
While plain melting moments are wonderful on their own, turning them into sandwich cookies with a creamy filling takes them to another level. Here are some filling ideas to try:
Classic Buttercream Variations
- Vanilla Buttercream: Beat 100g softened butter with 1 cup powdered sugar, 1 teaspoon vanilla, and 1 tablespoon milk until fluffy.
- Lemon Buttercream: Add 1 tablespoon fresh lemon juice and 1 teaspoon lemon zest to the vanilla buttercream.
- Passionfruit Filling: Mix 2 tablespoons passionfruit pulp into vanilla buttercream for an Australian classic.
- Raspberry Buttercream: Fold 2 tablespoons strained raspberry jam into vanilla buttercream for a fruity twist.
Creative Modern Twists
- Salted Caramel: Fill with thick salted caramel sauce for a sweet-salty contrast.
- Chocolate Ganache: Mix equal parts hot cream and chopped chocolate for a rich filling.
- Coffee Cream: Add 1 teaspoon instant espresso powder to vanilla buttercream for a grown-up flavor.
- Citrus Curd: Use lemon, lime, or orange curd for a tangy center.
How to Make 3-Ingredient Melting Moments
When time is short but your craving for melting moments is strong, this simplified 3-ingredient version comes to the rescue:
The Simplified Recipe
- 1 cup (225g) butter, softened
- 1/4 cup powdered sugar
- 2 cups self-rising flour
Quick Preparation Method
- Beat butter and sugar until light and fluffy.
- Gradually add self-rising flour until just combined.
- Roll into small balls and place on a lined baking sheet.
- Press each ball gently with a fork to create the classic pattern.
- Bake at 160°C (320°F) for 12-15 minutes until just set but not browned.
- Cool completely before handling.
While these 3-ingredient cookies lack the cornstarch that gives traditional melting moments their signature texture, they still offer a wonderfully tender, buttery bite that dissolves quickly. They’re perfect for last-minute baking when you need something sweet without a trip to the store.
Common Mistakes to Avoid When Making Melting Moments
Even experienced bakers can stumble when making these delicate cookies. Here are the pitfalls to avoid:
Texture Troubles and Their Solutions
- Tough cookies: Usually caused by overworking the dough. Mix just until combined and handle as little as possible.
- Cookies that spread too much: Either the butter was too soft or warm, or the dough wasn’t chilled enough. If your kitchen is warm, chill the shaped cookies for 15 minutes before baking.
- Too crumbly: Likely due to too much flour or cornstarch. Measure carefully using the spoon and level method rather than scooping directly with measuring cups.
- Not melting in the mouth: This signature quality requires the right ratio of cornstarch to flour. Don’t skip or reduce the cornstarch.
Storage and Presentation Tips
- Store in airtight containers at room temperature for up to 1 week.
- Place parchment paper between layers to prevent breakage.
- If filling the cookies, do so within 24 hours of serving to prevent them from becoming soggy.
- For gifting, stack them in pretty cellophane bags tied with ribbon, or present them in a tin lined with colorful tissue paper.
Melting Moments vs. Similar Cookies: What’s the Difference?
Many cookies share similarities with melting moments, which can cause confusion. Here’s how to tell them apart:
Comparing Yo-Yos, Shortbread, and Other Look-alikes
- Yo-Yos: These Australian/New Zealand cookies are nearly identical to melting moments and the terms are often used interchangeably. Some bakers claim Yo-Yos traditionally use custard powder instead of cornstarch, but the difference is subtle.
- Shortbread: Traditional shortbread uses only butter, sugar, and flour without the cornstarch that gives melting moments their distinctive texture. Shortbread has a firmer, more crumbly bite.
- Russian Tea Cakes/Mexican Wedding Cookies: These contain nuts and are rolled in powdered sugar after baking, creating a different texture and flavor profile.
- Viennese Whirls: These use a similar dough but are piped into more elaborate shapes and often topped with glacé cherries.
Understanding these distinctions helps you choose the right cookie for the right occasion—though they’re all delicious in their own way!
Adapting Melting Moments for Special Diets
The simple ingredients in melting moments make them relatively easy to adapt for various dietary needs:
Gluten-Free Options
Replace the all-purpose flour with a good quality gluten-free flour blend. Add 1/4 teaspoon xanthan gum if your blend doesn’t already contain it. The cornstarch in the recipe is naturally gluten-free and helps maintain the tender texture.
Vegan Adaptations
Substitute the butter with a high-quality plant-based butter substitute that’s designed for baking. Make sure to choose one with a fat content similar to dairy butter (around 80%) for best results. Miyoko’s and Earth Balance are good options that won’t make the cookies spread too much.
Reduced Sugar Versions
While sugar contributes to the texture as well as sweetness, you can reduce it by about 25% without drastically affecting the result. Using powdered erythritol or a stevia/erythritol blend designed for baking can also work, though the texture may be slightly different.
Frequently Asked Questions
What are melting moments?
Melting moments are delicate, buttery cookies named for their distinctive melt-in-your-mouth texture. Made primarily with butter, flour, and cornstarch, they have a tender, crumbly structure that dissolves quickly when eaten. They’re often made into sandwich cookies with sweet fillings like buttercream or fruit curd.
What is the definition of melting moments?
The term “melting moments” refers both to the cookies themselves and the sensory experience they create. The definition encompasses shortbread-like cookies that contain a high proportion of butter and typically include cornstarch to create their signature dissolving texture when eaten.
Is a YoYo a melting moment?
Yes and no. Yo-Yos and melting moments are extremely similar cookies that are often considered the same thing, especially in Australia and New Zealand. The main difference is that traditional Yo-Yos sometimes use custard powder instead of cornstarch, which adds a subtle vanilla flavor and yellow color. However, many bakers use the terms interchangeably.
How do you make 3 ingredient melting moments?
Three-ingredient melting moments can be made with just butter, powdered sugar, and self-rising flour. Beat 1 cup softened butter with 1/4 cup powdered sugar until fluffy, then add 2 cups self-rising flour and mix until just combined. Shape into balls, press with a fork, and bake at 160°C (320°F) for 12-15 minutes. While simpler than traditional recipes, these still offer a tender, buttery cookie that’s perfect when you’re short on time or ingredients.